How do I edit or delete a product?
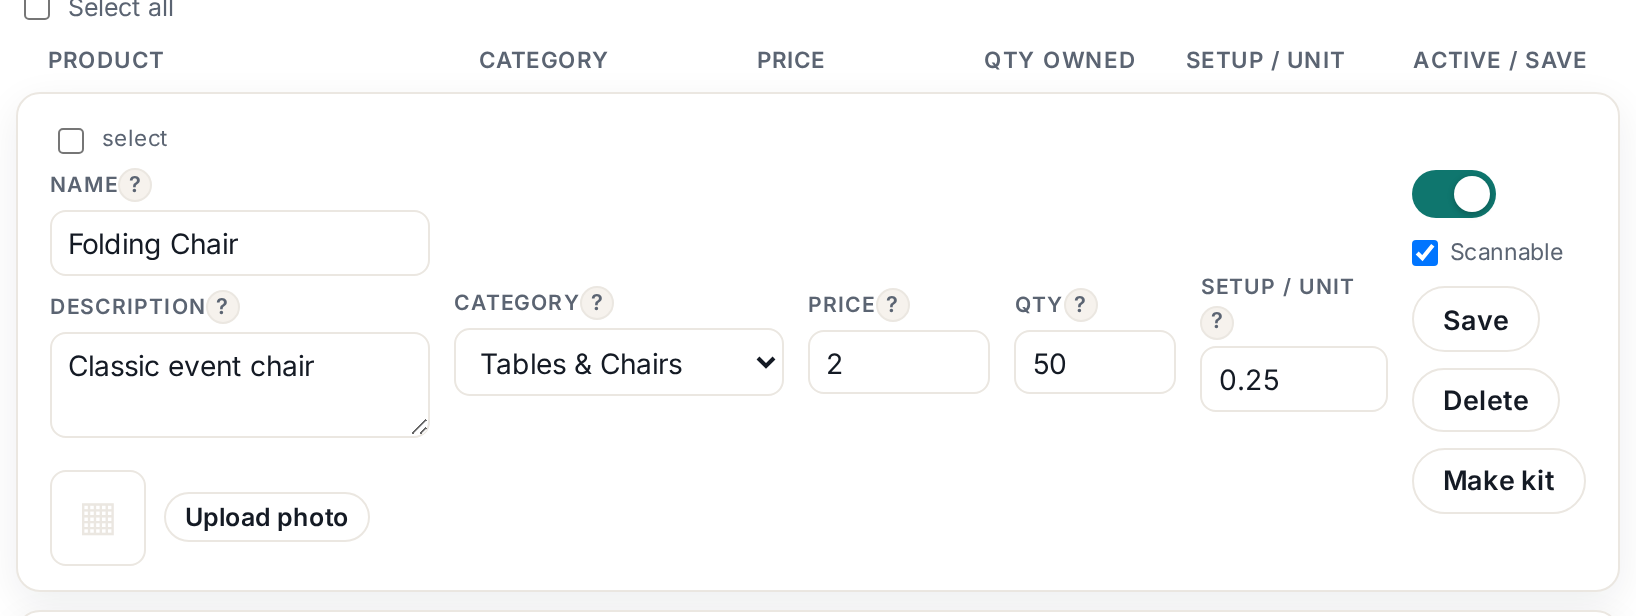
Every product row has editable fields, a Save button and a Delete button.
Plan: All plansWho: Everyone
Nothing is hidden behind a menu — every product row is already an open form. The Save and Delete buttons live in the ACTIVE / SAVE column on the far right of each row.
Inventory›find your product›edit any field›Save
 Tap to enlarge
To change a product#
- Open Inventory in the left menu.
- Every row is editable in place. Click into any field and type:
- Name — the title customers see on your storefront.
- Description — the smaller text under the name. Optional.
- Category — the dropdown that groups it on your site.
- Price — what you charge per rental period.
- Qty — how many you can rent out at once (see the note below).
- Setup / unit — an extra per-item fee applied only when the customer picks delivery + setup.
- Click Save on the right of that row. The button confirms when it has saved.
!
One row at a time — Save only saves the row you clicked. If you edited three products, click Save on all three.
To delete a product#
Click Delete in the same right-hand column, directly under Save. You will be asked to confirm, because it cannot be undone.
★
Deleting is usually the wrong move. If you still own the item but do not want it bookable right now — it is damaged, or it is out of season — switch the green Active toggle OFF instead. It vanishes from your storefront and keeps its history and past bookings intact. Flip it back on when you are ready.
To change several at once#
Tick the select checkbox on each row you want (or Select all at the top of the list). A bar appears with Delete selected and activate/deactivate — useful for clearing out the sample products in one go.
To add a photo#
Click Upload photo on the row. Products without a photo still book fine, but a real photo of your actual gear is the single biggest thing that makes a storefront look trustworthy.
i
Cannot find Inventory in the menu? You may be in Simple mode, or signed in as a Driver. See "A tab or feature disappeared from my menu".
More in Your inventory
How does availability work? Will I get double-booked?The quantity you set IS your availability. Rennt subtracts confirmed bookings automatically.What is the fastest way to add my inventory?Browse product library — ~50 items with prices already filled in.Categories: organizing your storefrontGroup products into sections customers can filter. Where to create them and how to name them.Kits and bundles: package deals as one productSell a package as one storefront product while Rennt reserves every item inside it.Product photos that actually get bookingsA phone camera is fine. How to add photos and what a good rental photo looks like.